Previous Posts

Tuesday, 18 November 2014

WE'VE MOVED


Hey guys - we have recently launched a website (www.nurture-with-nature.co.uk) which has both my current blog and recipes, along with a store where you can buy hampers of healthy goodness for yourselves and/or friends! Please head over there in future to stay updated with Nurture with Nature and all our latest kitchen experiments!

Stay happy one and all! X

Thursday, 11 September 2014

Breakfast boost


Here is a super simple pancake (and I use that word loosely) recipe! Despite the way they look, there isn't really anything that pancake-y about them! They are flourless, eggless and milkless! But tasteless they are not - my boyfriend adored these and he doesn't even like regular pancakes!

All you'll need is:

1 cup ground almonds
1 cup oats
1 cup water/almond milk
1/4 cup milled flaxseed (or flax mix)
2-3 super ripe bananas
a squirt of maple syrup for sweetness
coconut oil for cooking

Mash your bananas until smooth and then mix them in with all your other ingredients. Stir well until everything is well combined and then get cooking! Heat your pan with a little coconut oil and then spoon out your mixture to make pancakes of whatever size you want. Make sure your heat isn't up too high as you'll need to let them cook properly on one side before being able to flip without them breaking, and you don't want them to burn! Once they feel more solid, flip them and cook on the other side. Keep going until you're out of mix and then serve on their own or with fruits of your choice! These pancakes taste and look more like giant oat biscuits or flapjacks so none will believe you when you say they're a healthy breakfast (or lunch/dinner/pudding...) option! PS - fear not if you make too many, because as they cool they firm up even more and then you'll find them dangerously close to cookie territory!

Enjoy!

Oh and don't forget - spread a little happiness today! X

Friday, 29 August 2014

The best banana bread!


Two of my favourite sweet treats - banana bread and Nutella! So what a perfect brainwave when I decided to combine the two! For this recipe, I used the 'Not-so-naughty Nutella' recipe from a previous post and a banana bread recipe that I'll give you all now :)

Banana bread is a firm favourite across the board and something that can be done so well! However - especially when baking gluten free, it is also something that can be tricky to perfect because of the nature of the heavy bananas and the naturally more dense GF flour! But by using ground almonds instead, I'm pleased to say that this recipe comes out quite light, even if its not a big riser.


For one delicious cake you'll need:

6 very ripe bananas
3 cups ground almonds (or pecans/other nuts)
1 cup rice/buckwheat flour
1/3 cup maple syrup (or other liquid natural sweetener)
1-2 tbsp cinnamon (depending on how much spice you like!)
a splash of almond milk if the mixture seems too thick

and then... 1/2 jar of homemade Nutella 

Preheat your oven to 150 degrees centigrade. Start by mashing your bananas until smooth. Then mix together your ground nut flour, rice/buckwheat flour, maple syrup and cinnamon and finally stir in the mashed bananas. The mixture should be sticky but if its too thick then add a splash of almond milk before putting 1/2 the mixture it into your greased loaf/cake tin. At this point, spoon 3-4 heaped tbsps of your homemade Nutella over the top and then finish by pouring the rest of the mixture over the Nutella. Place the cake into the centre of the oven and leave to bake for 50ish mins (but I always check at about 40 mins). Once cooked, leave to cool for a few mins and then add more healthy Nutella to ice your cake! The coconut oil in the Nutella should mean that its starts melting from the heat of the freshly baked deliciousness! TOO - GOOD!

Happy baking one and all!

Oh and don't forget - spread a little happiness today! X

Sunday, 24 August 2014

Caribbean rice!


This rice recipe is so simple and really really tasty! The great thing about it is that it's versatile - so if you're out of black eyed beans, or green peas (like I was in France when we tucked into this dinner), you can still make it work and no one will be any the wiser!

This is not a strict recipe passed down from generations before me - it's actually just something I threw together in a bid to combine some of my favourite Caribbean flavours, without acting as the main event - which in this case was the jerk chicken!

For this you'll need:

1 cup brown rice
Boullion or other stock
Olive oil
Coconut palm sugar/demerera brown sugar
Soy sauce
Black eyed beans/red kidney beans/haricot beans
Peas and/or sweetcorn
1 x onion

Start by boiling the rice in a little stock (see a previous post on cooking perfect rice!) and then move onto the yumminess that will eventually be mixed into the rice. First dice your onion and drain your beans - the next part of the recipe requires moving quickly and carefully so make sure you're totally prepped at this stage. Also, make sure you have a lid for your pot at the ready! Now drizzle a little olive oil so that it's covering the base of your pot in a thin layer. Let this oil heat up on a high heat and sprinkle over enough sugar to again cover the bottom of the pan but not too thickly. You will notice the sugar starting to bubble and turn golden brown - go against your better judgement and allow the sugar to continue caramelising until it's starts to turn much darker in colour, almost black! At this point throw your beans and onions into the pot and cover quickly as this will cause splashing and spluttering, and you do not want to get hit by what is essentially boiling caramel! Let it do it's thing for a few seconds until it sounds as though things have calmed down in the pot, then turn the heat down, lift the lid and give the whole lot a careful stir - the onions and beans should be thinly coated in the sweet mixture. Now add a dash of soy sauce to give it a little saltiness and season with some pepper too. Leave the onions and beans to cook gently for 5-10 mins and just before they're done, pop the sweet corn and peas into the pot to heat through. Once both the rice and beans are cooked, mix everything together, do a quick taste test and then serve with whatever else you fancy!

Good luck :) Let me know how you get on!

Oh and don't forget - spread a little happiness today! X

Thursday, 17 July 2014

Top notch pasta sauce


Let me start by saying, this dish was an exceptional accident! One afternoon last week, I came back from work and was starving. I couldn't get pasta out of my head, and fancied something really stodgy - but long gone are the days where I'd have a cheese sauce or carbonara, so I had to improvise with the few ingredients in my kitchen... I have to say I was genuinely shocked at the result - sometimes accidents really just are the best!

I had half a sweet potato left over from the night before, some yummy fresh red pesto, half a bag of spinach, and of course an avocado. So with a little inspiration from previous a faux mac 'n' cheese recipe (using butternut squash/pumpkin) I boiled the sweet potato and took it from there!

You HAVE to try this! It's so simple, and yet satisfying whilst still remaining healthy and nutritious!

You'll need (for one very hungry person):
1/2 sweet potato
A little red pesto
Chillies (if you like a kick)
Spinach
Olive oil
Salt and pepper
Pasta shapes of your choice

Simply chop up the sweet potato into quarters and boil for about 8/9 minutes, at this point add your pasta so that it cooks in the same, now sweetly flavoured, water (depending on your pasta this should take 8-12 mins). Be careful not to bash the sweet potato too much when stirring the pasta as you want to be able to fish out the chunks in a minute. When pasta and sweet potato are cooked, put the sweet potato pieces in a blender/food processor and strain the pasta and drizzle with olive oil. Add to the sweet potato some olive oil, seasoning, and pesto and then blitz it until its smooth and creamy - add a little water to the mixture if needed. Now mix as much spinach as you fancy into the pasta and let it gently wilt with the heat. Finally pour over the sweet potato pasta sauce, which should be thick and creamy and nicely coat all your pasta shapes! As it cools slightly the sauce will thicken up a little more, much like a cheesy sauce and then just tuck in! It's seriously gonna be hard not to go back for more!

Let me know how it goes!

Oh and don't forget - spread a little happiness today! X

Frittata frenzy


This dish is one of my go-to dinners if I'm tired or a little behind on meal planning! It's incredibly easy, and really, really versatile!

I've not always been a huge fan of eggs, so it might seem odd that I am posting a recipe for an eggy frittata! However, this recipe uses the egg to bind all the ingredients together rather than acting as the bulk of the meal (like it does in an omelette)... My eggophobia is slowly dying out and thanks to this delicious frittata, my egg horizons are expanding and I even dabble in a little scrambled egg now and again too!

The best thing about this recipe, is that doing a specific food shop for it isn't essential - this is the perfect meal for using up all those half empty bags and packets of veg. This particular frittata had mushroom, onion, courgette, broccoli, sweet potato, cherry tomatoes and asparagus in it!


So, you'll need:

Approx. 2 eggs per person (but this can be varied depending on how hungry you are and how much you like eggs!)
Loads of thinly sliced veg (really thin for potatoes in particular, or alternatively par boil them first)
Salt and pepper to taste
Roughly chopped basil leaves
Olive oil
2 tbsp red pesto (homemade or bought, but ideally as fresh and natural as possible to avoid adding loads of preservatives and nasties to your delicious meal!)

- PS - for the meat lovers out there, feel free to add pancetta bits, grilled chicken or anything else you might fancy in with the veg!

Start by preheating your oven to about 180 degrees celcius.

1) Simply prep all your veg (and meat if you're adding this in).
2) Then whisk your eggs with salt and pepper, olive oil, red pesto and a splash of water.
3) Fill your dish with all your tortilla fillings - I tend to work in layers to ensure I get a little bit of everything everywhere, but I'm sure chucking the whole lot in at once would work too!
4) Now pour in your egg mixture, which should just about cover the top layer of fillings and pop it in the oven to bake. For the cheese lovers, grate or slice your favourite cheese onto the top of the tortilla 10/15 mins before it's ready to come out (I added my favourite goat's cheese to mine)!

Now to briefly talk timings -  depending on how deep your oven dish is, this will vary. The amount and type of fillings will also affect the timings, so in my experience, its a slight guessing game. It should take about 40 mins to cook the whole way through, but check at 30 and make sure nothing is burning and cut into the middle to check that the egg isn't runny. If it is, then cover the frittata with a sheet of foil and pop it back in until the whole thing is cooked through.

Make sure you give this super tasty frittata a go when you next feel like you can't be bothered with a big supermarket run!

Oh and don't forget - spread a little happiness today! X

Thursday, 3 July 2014

Not-so-naughty Nutella!


Nutella has always been a vice of mine! But since becoming more and more health conscious over the past few years, it has been firmly removed from my kitchen cupboards - much to my tastebuds' horror! Despite the adverts claiming that Nutella on toast really is a nutritious start to the day, I was only too aware of the dangers of this super sugary spread!

However - and this is big, so brace yourselves - I have finally discovered an almighty combination of ingredients that not only beats the original Nutella in flavour, but also in nutritional value! This recipe is utterly delicious, and I'm so excited to share it with you!

For one small jar you'll need:

1 cup of roasted hazelnuts*
1/2 cup of almonds
1/3 cup raw cocoa powder (more or less depending on how chocolatey you want your Nutella)
4 tbs pure maple syrup (or another liquid sweetener of your choice)
1/2 cup almond milk
1 tbs coconut oil
A little pure vanilla essence to taste

*If you buy whole hazelnuts, you'll have to roast them for about 15 mins on 180 degrees Celsius, let them cool and then remove the majority of the crispy skins. Alternatively you can get away with buying the pre chopped roasted nuts and start from there. But whichever way you do it, make sure the nuts you use are roasted as this will intensify the nutty flavour!

Its super easy!!! Start by blitzing all your nuts to the point where they turn from a finely ground powder, to a smooth butter as the natural oils are released. At this point add the rest of your ingredients and give the whole lot another blend. Make sure you use a spoon to loosen the nut butter that will no doubt be glued to the side of your food processor and get everything thoroughly well mixed. If you find your Nutella is a little lumpy or too thick then just add small amounts of almond milk until you get the consistency you want!

I hope you all have fun making this gem of a spread, and enjoy incorporating your new Nutella into all your favourite breakfasts and desserts!

Oh and don't forget - spread a little happiness today! X

Friday, 27 June 2014

Sorry, I've been away!


Hi all!

Sorry for my absence of late, but over the past couple of weeks I have finished uni and been lucky enough to holiday in Spain and France with my nearest and dearest! Having thoroughly enjoyed a well-earned break, I thought I'd share a few photos of my time away...

Gorgeous white beaches in Menorca...


An incredible sunset from a hilltop restaurant while munching on yummy tapas!


And then onto the teeniest little village in France, with absolutely stunning architecture, history and culture, literally seeping out of the walls!


I've just had the best few weeks - but I'm back this weekend and ready to share some culinary delights with you all - look out for some European inspired yumminess! I hope you've all been enjoying the start of summer, soaking up some rays and munching on all the best fruits and veg the sunshine brings!

Oh and don't forget - spread a little happiness today! X

Friday, 6 June 2014

Irresistible risotto


For those of you that don't know me - I am the biggest lover of risottos! This risotto is totally tasty and oh so satisfying, and no one will question its lack of dairy! During my one week vegan cleanse I really craved a hearty bowl of my favourite rice dish but panicked at the thought that I couldn't use dairy and didn't have my food processor with me at uni to create a delicious cashew 'cheese'! So I was forced to improvise, and something amazing happened!

This risotto was made from brown rice and coconut milk. So simple.

For a batch big enough to feed two very hungry humans you'll need:

1 cup brown rice
2.5 cups water
Boullion powder
1 can coconut milk (light if preferred)
Veggies of your choice
Seasoning

Start by boiling your rice, and add a tablespoon or two of Boullion powder to the water. As extensively explained in a previous post, put cold water in with the rice and bring it to the boil, once bubbling, turn the heat right down to low and cover with a lid (this will make perfect rice every time!). But in this case, for the risotto, feel free to give the rice a little stir and release some of the starch, because that will only add to the creaminess later on. While the rice is cooking (about 40 mins) you can chop your onions, garlic, and other veg (I used broccoli, sweet potato and butternut squash) and steam/boil/sauté/roast them until cooked. At this point, pop them into a pan with the coconut milk and heat through. Season the mix with salt, pepper, Boullion, herbs and/or spices to taste and finally add the whole lot to your rice. Mix it all through properly and let it sit for a minute or two in order to allow all the flavours to mix properly into the rice. The liquid should seem to disappear as it is absorbed into the rice and the risotto should become glossy (as in my photo above) - now you're ready to eat! Serve with a side salad, fish, grilled chicken, or just as it is. And there you have a totally delicious vegan alternative to the classic veg risotto, adaptable to all seasons and tastebuds!

So hit the shops, grab your favourite risotto ingredients and try this recipe out! I'd love to hear how any of you get on, so please post your creations on Instagram and mention @nurturewithnature!

Oh and don't forget - spread a little happiness today! X


Wednesday, 28 May 2014

Fantastic flapjacks!


Here is an amazing recipe for those of you with a sweet tooth!

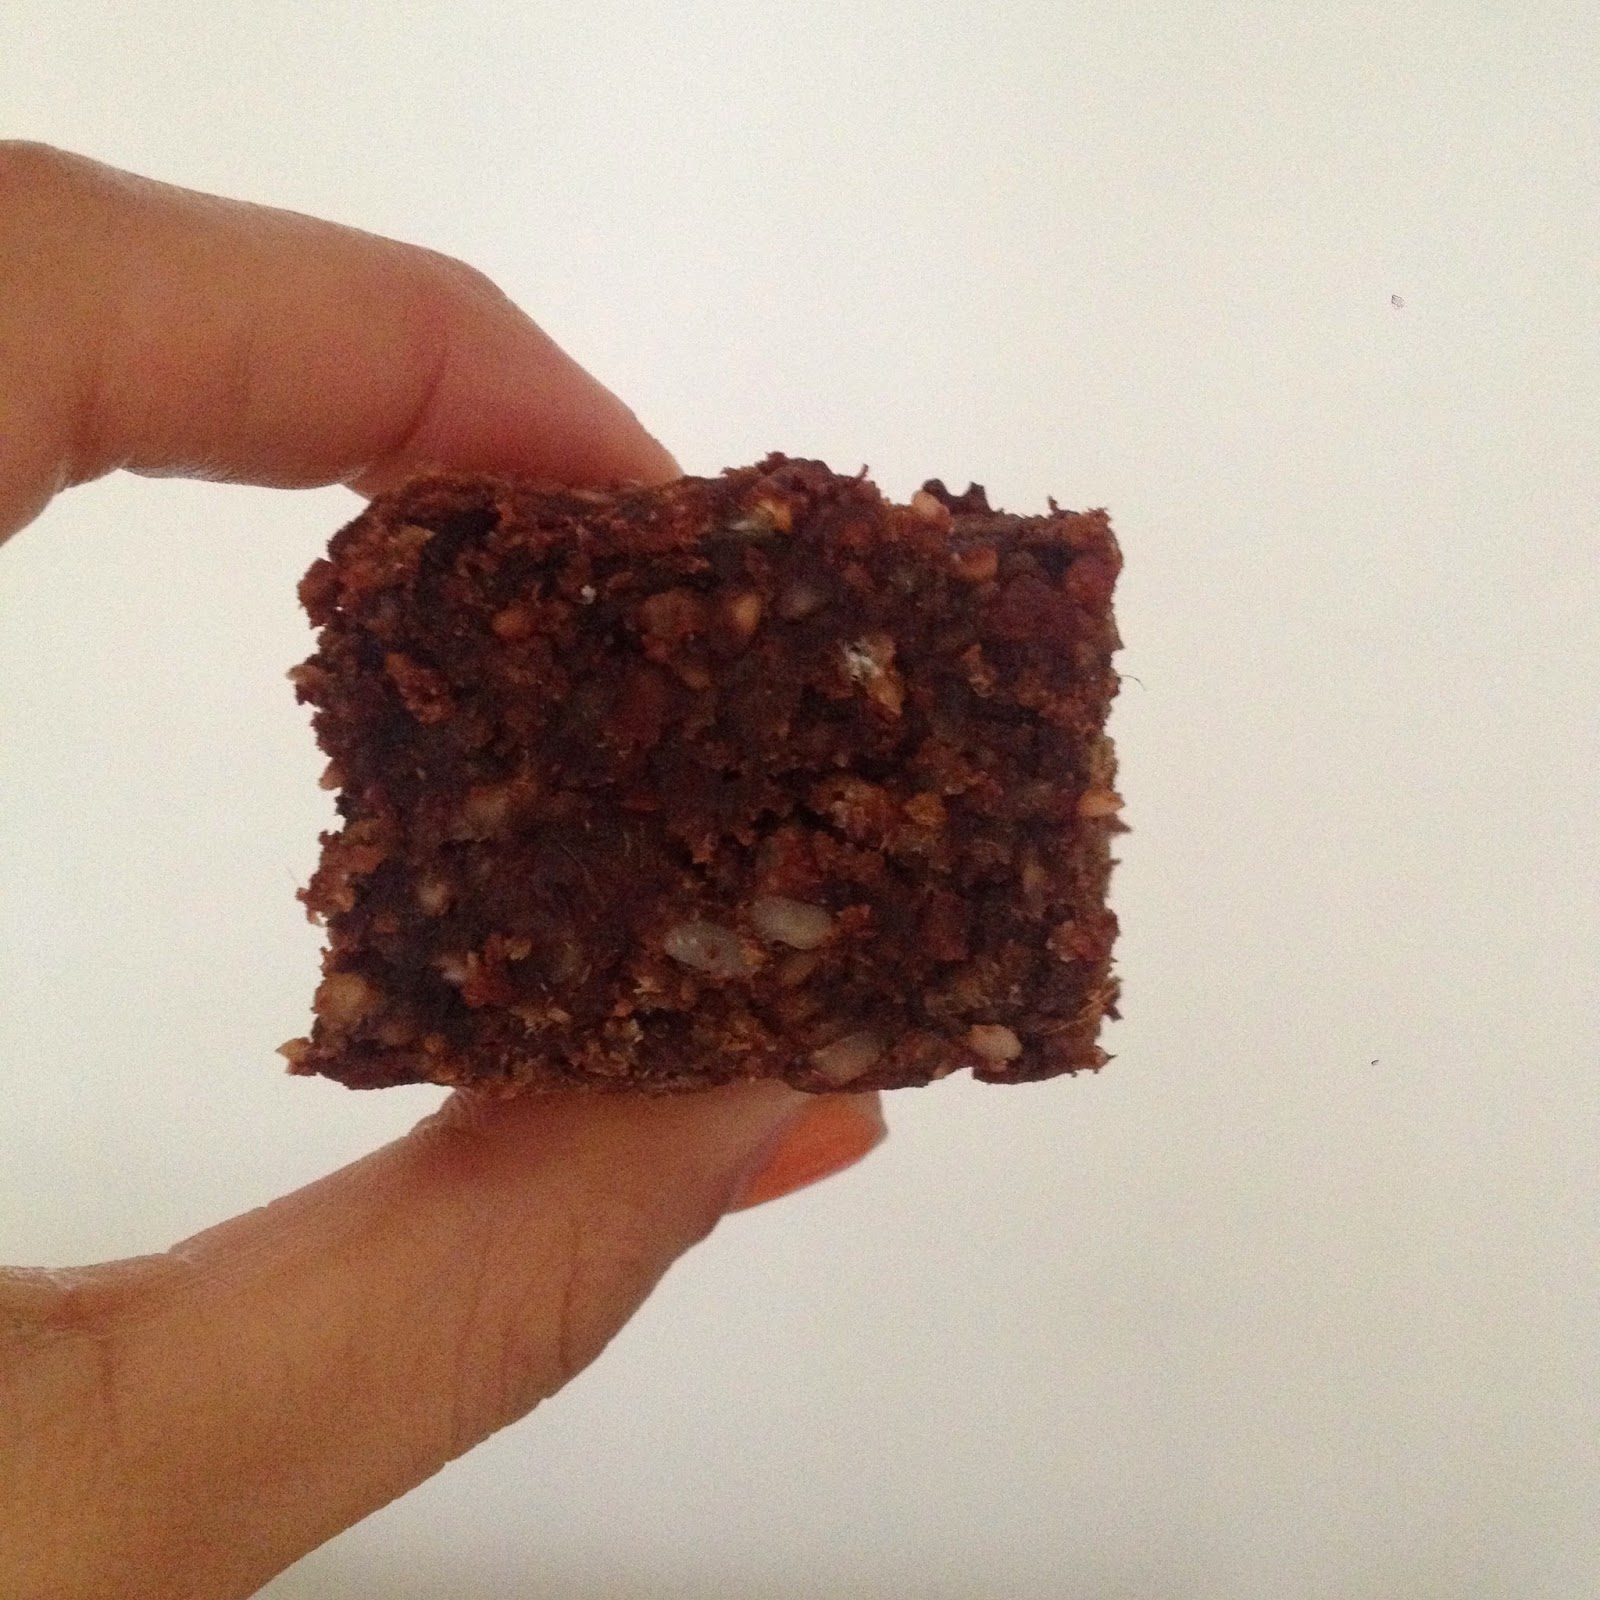
Ready for it?? ...a chocolate, cinnamon flapjack! This creation is so great, because its super flapjacky, with a twist of brownie, and a hint of fudge cake all swirled into one! A serious crowd pleaser and packed with all natural vitamins, proteins and nutrients from the nuts, dates and raw cocoa to give you that natural high, and guilt free enjoyment!

For a one batch you'll need:

1 cup pitted medjool dates
1 cup warm water
2 cups oats
1/2 cup raw cocoa
1/2 cup almond butter
1/2 cup cashews
1/2 cup sunflower seeds/mixed seeds
A drizzle of maple syrup to taste
1-2 tbsp cinnamon

Soak the dates and cashews in the warm water and leave for minimum 20 mins. Then pour the whole lot, plus the almond butter into your food processor or blender and blend until you've got a sticky, slightly lumpy consistency. At this point, add you oats, cocoa, seeds and cinnamon. Give the mixture a good mix and taste. If the cocoa has made it slightly bitter or you just like your sweet treats really sweet (like me!), then add a drizzle of maple syrup and mix it in well.

All you need to do now is pop it all into a tray or tin and flatten the mixture out and bake in the oven at about 180 degrees celcius for 15/20 mins. Obviously the size of baking dish you use will determine how thick your flapjacks will be (and how long they take to cook) - I used a medium sized heart shaped tin and my flapjacks came out about 1-1.5 inches thick. 


These treats are perfect for all occasions, breakfast to dessert so make sure you try them out as soon as possible! The only problem is that they're so delicious they won't last long - so make sure you get your hands on one before they fly off the plate!


Oh and don't forget - spread a little happiness today! X

Saturday, 24 May 2014

Attitude of gratitude


It's the weekend - HAPPY SATURDAY!

It's time to wake up with a smile on your face because for many of us, this weekend is a bank holiday, so you've got an extra day of weekending ahead of you! My post this morning isn't food related as such, but it is about feeding your soul!

Happiness is such a complex phenomenon to put into words - there's not one definition that really captures what its about. That said however, we all know when we are happy, and equally when we really aren't! If any of you have been struggling to feel inspired lately then this post is for you! It is not always easy to focus on the good things in our life, but that is what I'm reminding you to do. 

Firstly, look around you and find something you're grateful for and say thank you. Then look at yourself in the mirror and smile! I know this might sound odd, but I'm telling you, smiling is contagious - you can even catch it from yourself! Combining genuine gratitude with a huge smile is the recipe for attracting even more fantasticalness into your life, and armed with this attitude, you're ready for greatness!

So put that spring back in your step and create the life you want for yourself!

Oh and don't forget - spread a little happiness today! X

Monday, 19 May 2014

Finger food


Good morning Mondayers!

Having recently moved into a new flat, we had a housewarming this weekend! It was such a great way to get everyone together and proudly show off our new place!

It was super summery weather and although we weren't doing a proper dinner party, nibbles were definitely an essential! So I wanted to do yummy finger food - gluten, dairy and sugar free of course - that tied in perfectly with the sunshine, and that wouldn't take me all day to prep! But initially when thinking about what to make, I struggled... Why is it that party/finger food is often based around pastry and bread? A huge assortment of gluten filled treats - sausage rolls, cheese swirls, pizza and sandwiches! I decided it was time to show people how delicious and versatile healthy food can be!

Menu:

Avocado cream
Sundried tomato houmous
Piri piri houmous
Chopped veggies
Crisps and tortilla chips
Grilled sausage bites (not ready in time for the photo)
Brownie bites (also still in the oven!)

The avocado cream is super easy - simply blend as many avocados as you want with olive oil and season with salt and pepper to taste.

Houmous is also really simple - blend a tin of chick peas with 2 tbsp of olive oil, 60ml of tahini (sesame seed paste), 4 tbsp water, a squeeze of lemon juice and salt and pepper. This will make one batch of plain houmous which is subtle in flavour but supper delicious! To make flavoured spreads, just add to the plain houmous - sundried tomatoes, roasted red peppers, paprika, basil or other herbs.

For the meat eaters I wanted to make cocktail sausages but unfortunately the local supermarket was all out so I bought a selection of flavoured cumberland sausages, grilled them and served them in bite sized chunks with cocktail sticks - the lucky dip sausages were a hit! I think I'll stick to these in future!

And finally, the brownie recipes will be up later this week - so stay tuned for those!

So there it is - my super basic guide to tasty low maintenance nibbles, that take minutes to whip up! Give them a go this weekend - summer is here!

Oh and don't forget - spread a little happiness today! X

Monday, 12 May 2014

Pizza perfection


Pizza is one of my absolute favourites and generally quite a crowd pleaser - but as we all know, it tends to come packed full of naughty fats and gluten which can put some of us off the idea! However this adaptation of the classic is undoubtedly one of the best, just as tasty and doughy and far far better for you!

The great thing about homemade pizza is that you can easily have a tailor-made experience and build it up with all your favourite toppings! This is such a great idea for a family night in, or a laid back dinner party with friends! You can prep the dough and tomato sauce beforehand and then invite everyone into the kitchen to create their own mini pizzas. Its a great way to involve children (if you have them) in cooking and encourage them to eat all the veggies they placed beautifully on their pizzas, and for those of you with adult friends, what a nice way to remove the pressure and workload of hosting a dinner party!

So, for the base you will need:

300g gluten free or spelt flour
190ml lukewarm water
1/2 tsp active dry yeast
1/2 tsp salt
a good few sprigs of rosemary (and any other herbs you fancy), finely chopped

For the tomato sauce:

300g cherry tomatoes
1 red onion
chilli flakes (as few or as many as you want)
chopped basil, thyme, oregano and/or any other herbs of your choice
olive oil
salt and pepper

Start by mixing the water and yeast and put it to one side, somewhere warm. Then get going on the sauce - chop the onion finely and sauté it in a little olive oil. Then blend the tomatoes in a food processor or blender, or alternatively chop them up nice and small for a chunkier tomato sauce. Add the tomato mix to the sautéed onions and stir in the chopped herbs, chilli and seasoning. Leave the sauce to simmer on a low heat until the excess water from the tomatoes has evaporated.

To make the dough, simply mix the salt and flour and pour in the yeast mixture. Knead the dough until all the liquid has been absorbed and the dough is firm and no longer sticking to your hands. If need be, add a little more flour, but not too much as you want the pizzas to be doughy and not too dry! Once the dough is ready, either roll it out to make one big pizza (should be enough for 4) or split into smaller individual portions. Cover the bases in the tomato sauce, and then just let loose with your toppings - meaty, veggie, raw or cheesy - the options are endless!

Leave them to bake for about 10-15 min depending on the size of your pizza bases, and depending on how crispy you want them! Serve with a side salad or just as they are and enjoy!

Oh and don't forget - spread a little happiness today! X

Friday, 9 May 2014

Mac 'n' cheese


Happy Friday everyone - the weekend is here and it's time to chill!

For those of you that are planning to have an evening in over the weekend, this vegan mac 'n' cheese recipe is the one for you! Mac 'n' cheese is the ultimate comfort food and when you're curled up on the sofa, a big bowl of it is exactly what you fancy, but then the pre/post guilt sets in and either you avoid it altogether feeling dissatisfied and ever so slightly sorry for yourself, or you spend the rest of the evening riddled with guilt. Well stop right there - that is no way to live! This recipe looks, tastes and smells totally indulgent, and will leave you feeling satisfied and chuffed with your latest healthy creation!

You'll need the following:

Gluten free pasta (how much will depend on how many you're cooking for and how hungry you all are)
Broccoli (chopped florets and stems! Don't throw the stems away, they're really tasty and filled with extra nutritional goodies!)
Leeks

For the 'cheese' sauce:

1/4 cup vegan butter
1/3 cup gluten-free flour
3 cups dairy-free milk (I use almond but the choice is yours)
1/2 cup nutritional yeast (NB - not baking yeast!! They are not interchangeable!)
1/3 cup cashews
1/4 cup pine nuts
3 tbsp tomato puree
1 clove garlic finely chopped, or 1 tsp garlic paste
2 tsp Boullion powder (any other good quality veg stock)
Lemon juice

Start by boiling the pasta according to packet instructions ensuring there is plenty of water and space to add the broccoli for the last 5 mins of cooking. Slice the leeks and shallow fry in a little olive oil or vegan butter until soft.

The cheese sauce is super simple. Simply melt the vegan butter in a pan and whisk in the flour to make a paste. Meanwhile, pop the cashews and pine nuts in a food processor (or similar appliance) and give them a whizz until you have a fine flour. Add the milk, nutritional yeast, nut flour, garlic, Boullion and a squeeze of lemon juice to the mixture and let the sauce simmer on a low heat until you have the desired consistency. Have a try and season with salt and pepper to taste.

Mix the pasta, cheese sauce, broccoli and leeks and you're done. Either serve there and then with a side salad of your choice, or (for the goats cheese lovers out there) pour the whole lot into an oven dish and grate a layer of hard goat's cheese on top and put under the grill for a few minutes! 

So invite some friends over this weekend and show off your culinary skills but make sure you do a big batch because I promise everyone will be having seconds!

Oh and don't forget - spread a little happiness today! X

Wednesday, 7 May 2014

Perfect porridge


Morning all! I hope you enjoyed the long bank holiday weekend!

This morning is about perfecting the simple but oh-so-delicious porridge, turning this staple brekkie from bland and stodgy to naturally sweet and delicious!

Grab yourself the following:

Gluten free oats
Almond milk (or any other dairy free alternative of your choice)
1 very ripe banana
1/2 a perfectly ripe banana
1 handful of berries (I've used blackberries in this one but strawbs/bluebs/rasps all work well too)

This breakfast takes all of 5 minutes to create and you'll find yourself feeling full, satisfied and well prepared for the day ahead! Simply put your oats and milk (I use about 1:2 ratio but it will depend on how runny you like your porridge) on the hob and leave on a medium heat. While the oat/milk mixture is warming, quickly slice your not overly ripe banana and rinse your berries, ready to pop on top in a few moments. Now head back to the stove and give the porridge a good stir. At this point, mash in your very ripe banana to add bulk and natural sugar! Pour the porridge into your bowl and top with your choice of fruits - all done! (P.S. leave the pan to soak while you gobble up all that deliciousness to make the aftermath that bit easier!)

Enjoy!

Oh and don't forget - spread a little happiness today! X

Saturday, 3 May 2014

Pancake day


Pancakes are the best - my favourite naughty treat! Or at least they used to be, now they're much less naughty, but still just as nice!

These banana and blueberry bad boys are super yummy and you can eat them in the knowledge that you're body is loving you with every mouthful! Now that's something to smile about isn't it?! To rustle this short-stack up you will need:

(makes 8 big Scotch pancakes)

200g gluten free flour (use can use rice/spelt/all purpose gf flour)
200ml dairy free mik (I always use almond milk, but soy/oat or others can be used too)
2 eggs (or replace with an extra banana for vegan pancakes)
A large handful of blueberries
1 ripe banana
A squeeze of agave nectar or date syrup if you want your pancakes sweeter
Vegan butter or coconut oil for cooking

Making pancakes is easy - mash the banana and beat the eggs, add everything else into the mix and you're done. The mixture should be thick (not like crepe pancake mix which should be really runny). Get your frying pan on a medium-high heat and grease it. Pour dollops of the mixture onto the pan so that the pancakes are a little bigger than the palm of your hand and about 1cm in thickness. Let them cook for a minute or two and then, when they feel cooked through enough to move, flip them! Serve with slices of banana and more blueberries. Enjoy!

This is a really versatile recipe - you can substitute or add any soft fruits (e.g. mango or red berries) to the mix and even add raw cacao powder for a chocolatey taste sensation, or gluten free oats for a more slow releasing energy hit! Now every day can be pancake day!

Oh and don't forget - spread a little happiness today! X

Friday, 2 May 2014

J is for juicing


It's Friday! Time for the weekend - but whether you've got a big one planned, or you're hoping to relax for a couple of days in preparation for next week, give yourself a boost today and get your weekend off to the best start!

A couple of months ago, I did a 3 day juice cleanse and I'm craving another one! Giving your body the chance to sit back and relax while filling it with all the natural goodness it could ever want is not something to be overlooked! Even if you haven't got the time or money to spend on a 3 day cleanse, do your body a favour and juice something today - you'll feel so great for it! Remember, if you're feeling tired, run down or just a bit off, its probably your body's way of asking for some much needed TLC - do not ignore!

Below are some shots of some of the delicious juices I made over the three day cleanse. The green had  spinach and celery in it; the purple, beetroot of course; the orange one was full of carrots and oranges; and the paler green had avocado and cucumber, amongst other things. But with all of them being made with a base of apple and/or pineapple juice, they were sweet and fresh, and hardly resembled the ingredients that were thrown in originally!


If you Google juicing recipes, you'll be flooded with new ideas for tasty combinations of fruits and veg! There is no excuse not to at least have a look for some juice-spiration right now, and for those of you without a juicer, don't fear, if you have a blender you can create something equally great! All you need is some good quality apple juice or any dairy free milk to act as the base for your smoothie - why not try adding a banana and some mixed berries?

There's no time like the present, so love yourself and reap the rewards!

Oh and don't forget - spread a little happiness today! X

Wednesday, 30 April 2014

Simply rice


Lunch can be one of those mealtimes when you're often in the middle of something that you're too busy to think about yourself and (whether you're a student, parent, at work or at home) suddenly its 1 o'clock and you're hungry! This can be dangerous - if you can avoid it, don't go rushing to the nearest shop and buy a sandwich and a packet of crisps! These won't give you the sustainable energy you need to finish your day properly and are not likely to offer too much in the way of nutritional value. Processed breads, hams and cheeses are never going to love you and your body in the way that an avocado will - I promise!

This is an absolute favourite of mine, both for lunch and dinner, and not only because it tastes so fab, but because it is so quick and easy to make and can be made in advance for an on-the-go lunch! An all round winner in my eyes!

All you need is:

1 cup of brown rice
Vegetable stock (I use Boullion powder, but use any veg stock cubes/powder - just try to avoid the overly salty ones!)
A large spoonful of green pesto 
Olive oil
1 x avocado
A couple of handfuls of chopped spinach and basil

Start by mixing 2 1/4 cups water to 1 cup rice and stirring in the stock. The following rice cooking tutorial is one that was passed down to me by my granddad and it works every time! I've shared it with family and friends over the years and everyone who once hated the battle of cooking sloppy rice has now been saved! Once you've tried this once, you'll never go back.

The water must be cold when you start, and then brought to the boil on the hob (this should take 3-5 mins), once its boiling, turn the heat right down and cover with a lid (preferably glass so you can keep an eye on things). The water should now be simmering as opposed to boiling. In the next 25 mins, you should be left with perfect fluffy rice, that doesn't need draining and hasn't stuck to the bottom of your pan. The real secret here is not to stir your rice at all until the end, when the rice is covered in hot water and you stir it, starch is released and this will make your rice sticky (which is why when making a risotto, you are required to stir the whole time). To check whether there is still water at the bottom of the pan, just tilt it to the side and see if any water becomes visible. If the water is running low and the rice is still al dente, just add a little more water and keep checking on it.

So back to lunch. Cook the rice. While this is simmering away, roughly chop the spinach and basil and put to one side. Slice an avocado and you're pretty much done. As far as the pesto goes, if you like home cooking and you have the time, and/or you have special dietary requirements, you can make a jar of your very own pesto easily! But dairy-free pestos are also available to buy, and otherwise you can just use any green pesto you like. Once the rice is done, drizzle over some olive oil, leave to cool for 5 mins so its not too hot, then stir through the chopped leaves and a dollop of pesto. Spoon the rice into a bowl and add the slices of avocado - so simple and so delicious!

For those of you at work - this is easily adaptable to a take away scenario. Just cook the rice the night before and let it cool all the way through to room temp (or use left overs). Then do exactly the same and box it up. The spinach and basil won't wilt and go soggy because the rice isn't hot and to stop the avocado from going brown squeeze a little lemon juice over it before you leave.

Happy munching everyone!

Oh and don't forget - spread a little happiness today! X

Monday, 28 April 2014

Cauliflower crazy


Today I stumbled across a Paleo recipe for RICE! Now for those of you who are less familiar with what Paleo is, this might not sound exciting, but for those of you who know that Paleo means no grains, this is a real find! As a regular consumer of my favourite grain, rice, I was a little sceptical about trying this Veggie Fried 'Rice' - but it turned out surprisingly well! Smiles all round!

Just in case anyone was wondering - the Paleo (aka Paleolithic) diet is a nutritional plan based on assumptions made about what our ancestors ate way back when. In general, this means eating based on what was likely to be available then (e.g. fish, meats, eggs, fruits and veg) and cutting out all grains, legumes, potatoes, salt, sugars and processed foods.

Anyway, back to my latest and one of my most favourite discoveries! This recipe calls for the following:

1 x grated cauliflower (this is your rice substitute - yes, you read right!)
1 x chopped onion
1 x large grated carrot
1/2 a bag of kale
1 cup of sweetcorn (frozen/tinned/fresh)
and seasoning of your choice (coconut oil, soya sauce, chilli flakes/powder, salt, pepper etc)

Simply grate the cauliflower by hand or in a food processor using a blade that will produce rice-sized pieces of cauliflower. Then do any necessary veg prep (making sure all the veg you are adding is chopped nice and small) and you're almost good to go. Heat the coconut oil in a wok and once melted, add the cauliflower and stir fry until it has the consistency of fried rice (this should only take a couple of mins). At this stage add all the vegetables and continue to stir fry for another 5-10 mins. Be careful not to let the bits at the bottom burn onto the wok - make sure you keep it all moving. Once the vegetables have been added, season the fried rice as you wish. Of course the recipe is not limited to the veggies I used, I'm sure that most others would go nicely and why not add some grilled chicken (or any other meat or fish of your choice) to compliment this scrummy dish!

This is another excellent cheat's way of getting your five a day - it gives some of the most uninspiring veg that Chinese take away edge that we all love, and all in a guilt free and totally healthy bowlful! So have a look in the fridge and use up all the last scraps of veg in this delicious Paleo fired rice!

Oh and don't forget - spread a little happiness today! X

Avocado addiction


Happy Monday everyone!

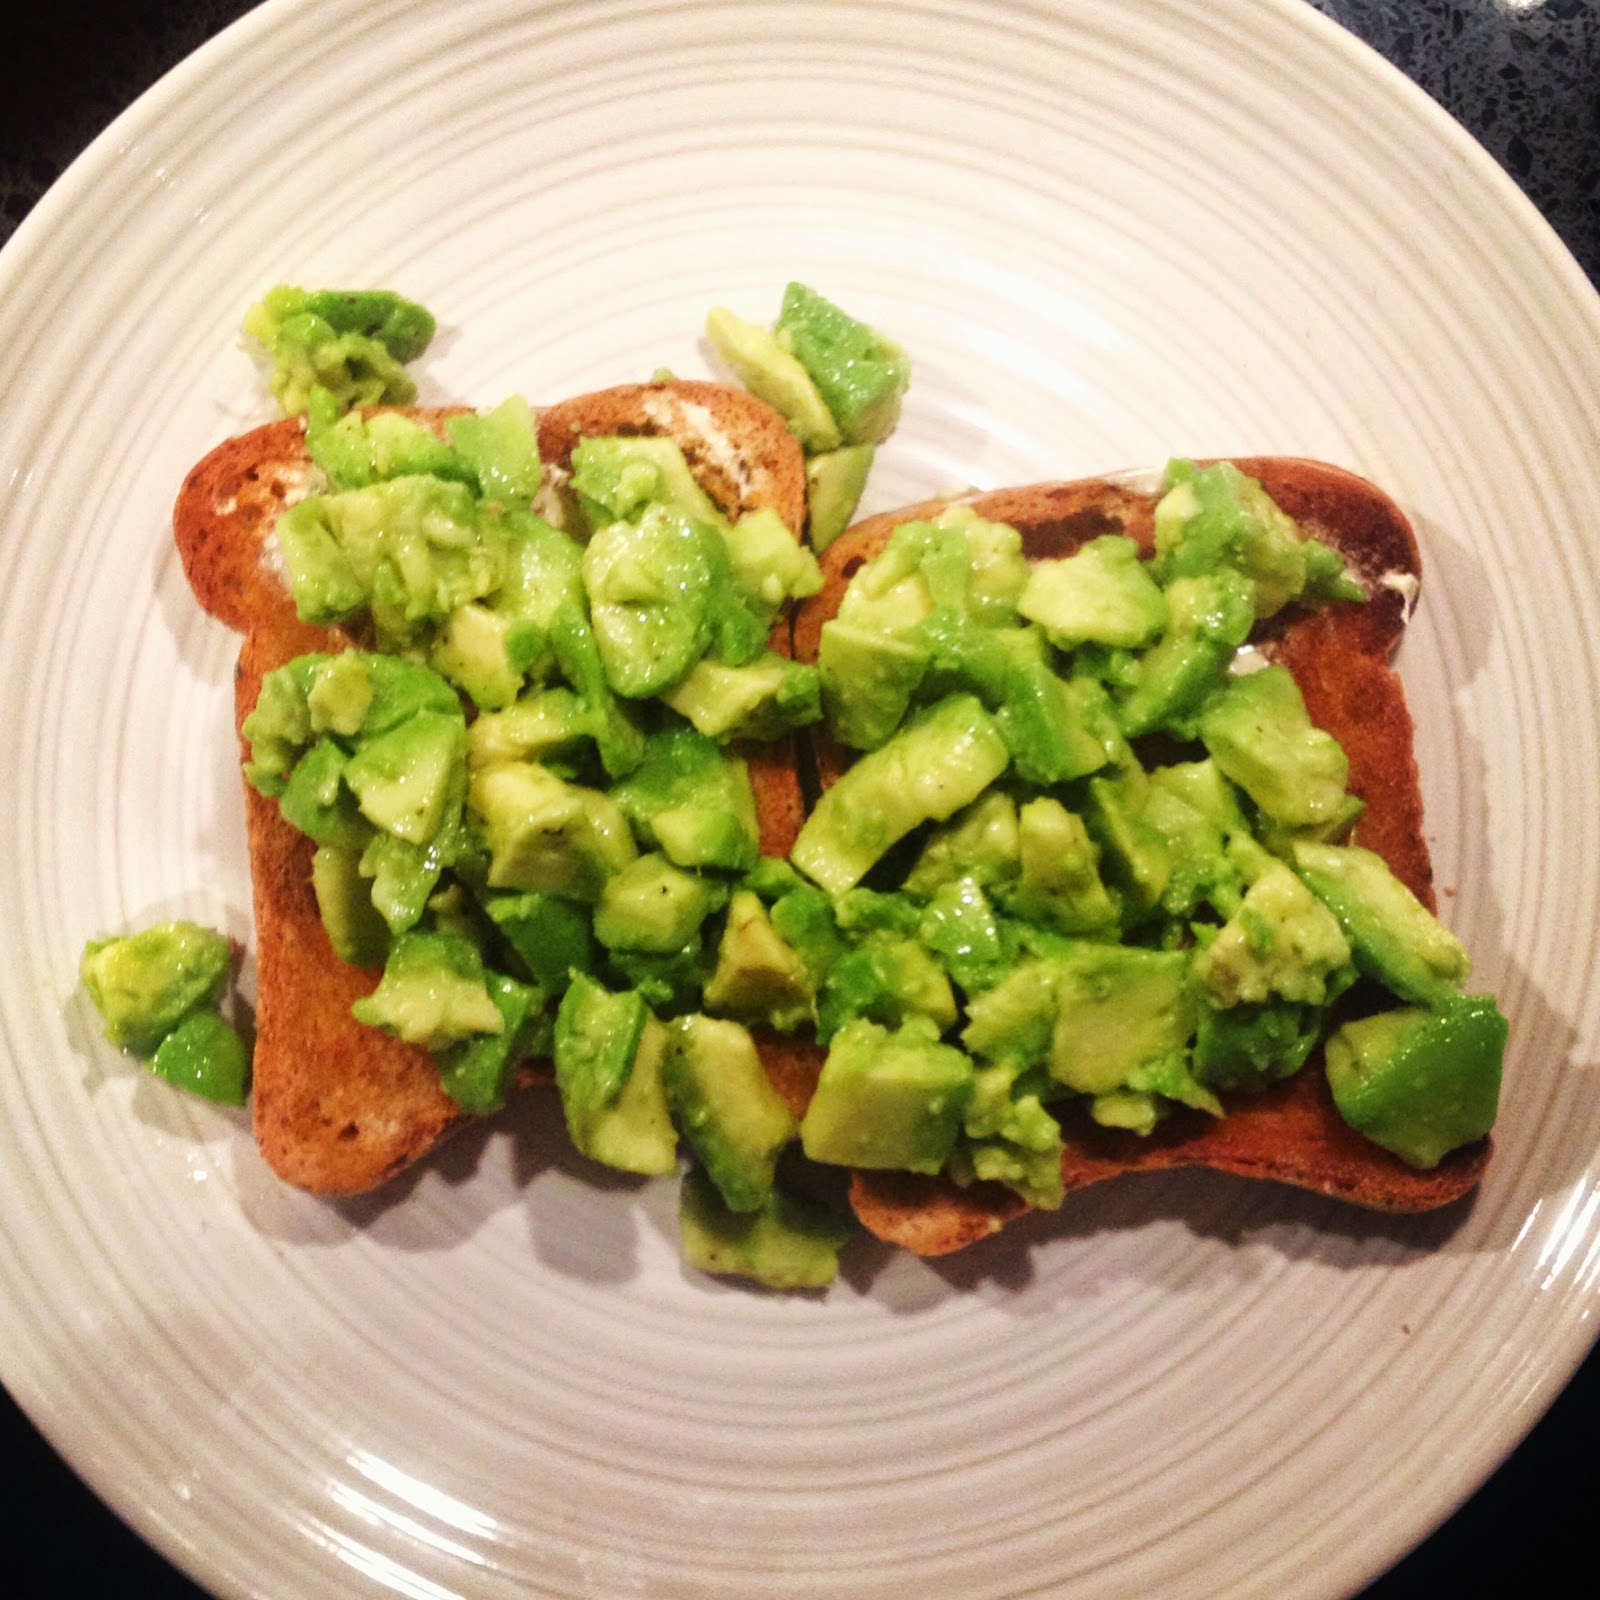
This morning I decided to take things back to basics. Avocados are one of the loves of my life - so creamy and green and filled with all natural goodness - they are a staple I cannot live without! So a simple but effective breakfast to start my busy Monday morning of lectures is a slice (or two) of brown gluten free toast with a light smear of vegan butter topped with chunks of avocado! If you want to spruce this ultra simple recipe up for friends, or just to treat yourself, then dress the avocado in a little lemon juice, olive oil, sea salt and cracked pepper - it really does the trick!

The real beauty of this breakfast is that it doesn't require any planning or prep (apart from the food shop of course) - but if you're running late, you can whip this nutritious and filling breakfast up in a matter of minutes and run out of the house feeling free of any guilt and washing up!

For most, this is probably the start of a busy working week, but try not to live for the weekend, today is as good as any to be happy and enjoy your life! Remind yourself of the things in your life you are grateful for and put a smile on your face as you walk out of the door!

Oh and don't forget - spread a little happiness today! X